Perfect Cup of Coffee on Maui

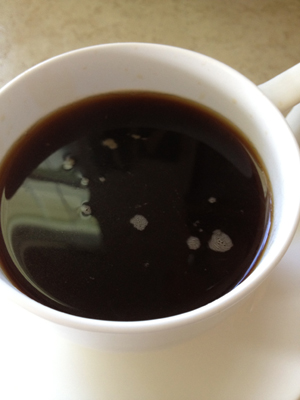
James, enjoying a cup of my fresh-brewed coffee.
Here’s a question I received in response to our recommendation to readers of Top Maui Restaurants to buy whole bean coffee souvenirs at Maui Oma in Kahului, Maui:
“I bought some coffee, and they asked me if I wanted whole beans or ground. I said whole beans, because I got flustered, but I don’t have a coffee grinder! So now I have this bag of delicious smelling coffee, and I’m not sure how to brew it. My friend says a French press is the way to go, but that all sounds so complicated. What should I do? – Coffee Newbie”
Well, Coffee Newbie, thank you for being brave enough to speak up and ask the question! It’s true that grinding and brewing your own coffee represents a learning curve. But it’s also true that it’s the best way to drink coffee, because you can control every factor and really make coffee the way you like it. The necessary equipment is no more expensive than a good drip coffee maker.
The following tips come from my own experience, my brother David, who used to run an independent coffeehouse in Boston, and trial and error. I’ll start out with some general principles, and then give step by step instructions.
Start with Great Coffee
If your coffee is old and stale, it just doesn’t taste good. Coffee declines in freshness within a couple of weeks or roasting – and sometimes sooner in our tropical climate. Here are some tips for buying and storing coffee:
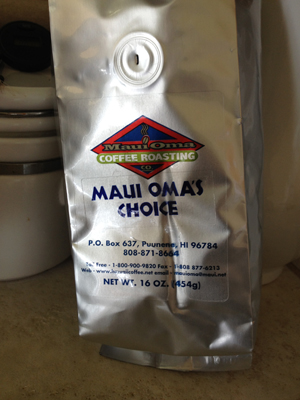
Buy whole beans in a resealable mylar bag that has the little off-gas valve. We like to buy several small bags rather than a large one, so the beans stay fresher longer.
Buy Whole Beans
Buy the best coffee you can, preferably in whole bean form, so that the many flavors in the beans — some say there are over a hundred — are preserved as much as possible. The flavor is carried in the oils, which are released during the grinding process. After grinding, oils start to break down, dissipate, and lose their flavor (or worse, grow rancid). Buying whole beans and then grinding immediately before brewing will make your cup sparkle with flavors you might otherwise miss. This is also why we prefer using a French press for our coffee brewing — with no paper filter soaking up those oils, coffee just tastes a lot better.
Use Them Quickly
Once a coffee bean is roasted, it starts to go stale, and within two weeks the flavor is noticeably … removed. That’s why it’s a good idea to buy your coffee in small quantities and make sure it comes packaged in a good bag, like the mylar bags Maui Oma uses. We like to buy a couple of pounds at once, but have them package the beans in smaller bags (1 pound or even 8 oz. bags). As long as you don’t open the bag, the coffee stays fresh for two or three months.
Once you open a bag, use it within twelve days – and in some climates (ours), six or seven.
Store Them Properly
Keep your beans in the original mylar bag (most come with resealable tape), and tightly rolled up against the air. We keep them in our kitchen pantry, in the darkest coolest area, next to our spices. Dark. Cool. Quiet. Coffee beans need their rest.
A note about freezing and refrigerating beans: don’t. Refrigerating them can lead to the beans picking up odd or off flavors, and freezing them leads to freezer burn. A cool dark place is best.
Also, note that the little off-gassing nub/valve on those mylar valves allows the carbon dioxide to escape the bag.
Choose the Right Grind
Grinding my coffee beans in the morning is one of the great pleasures of my life. There’s a ritualistic form to it. Once you know what you’re doing, you may find, as I do, that it’s quite soothing.
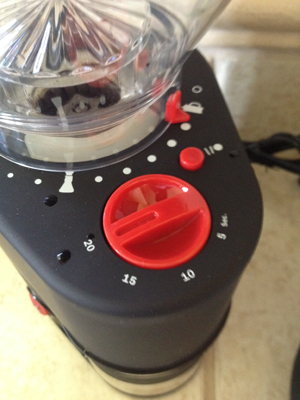
Using a grinder that gives a good, even grind is really important. We really like our Bodum grinder. It has glass and high-quality plastic parts that keep the grounds from sticking. It’s also easy to clean.
Most important, it is a powerful, slow grinder. The faster the grinder, the more the beans heat, and – you guessed it – the more oils get tainted by the heat. You want those oils released in the pot, not in the grinder.
Assuming you’re making your coffee in a French press, use the coarsest setting on the grinder. The grounds should be uniform in size, and quite large. Grounds that are too small will actually over-extract the coffee, resulting in bitterness.
Grind immediately before brewing for the best results.
Grind the Right Amount
It may take a few pot of coffee for you to get your exact right amount of beans to grind, but what you want to end up with is 2 ounces of coarse grinds for every six ounces of water you use.
(Most coffee supply companies measure coffee in 4 ounce cups – but we think 6 ounces is more like it.)
For example, for our standard size 34 ounce press, we measure 7 tablespoons of beans into the grinder and use all of the resulting grinds. This makes the correct strength coffee for the two of us.
If you want stronger coffee, use more grinds. If you want weaker coffee, use less.
Use Water that Tastes Good

Water that tastes good makes good-tasting coffee. We filter our water to remove the chlorine, and that’s just perfect!
The absolute key to great tasting coffee is great tasting water. We like Maui’s water just fine, but we filter it to remove the chlorine (yuck). You can use bottled water, if you’re in an area where you really hate the water, but it’s usually not necessary.
Heat the Water to the Right Temperature
Bring your water to boil (we use an electric kettle), and once it is at a full boil, take it off the heat and WAIT about ten seconds. Waiting for the water to cool just a little bit will keep the heat from destroying too many of those flavorful oils. The ideal temperature to use is between 195 and 205 degrees – just under a full boil. My tip is to remove the water from the heat, listen, and wait until you hear the bubbles fade – then take a couple deep breaths and pour the water.
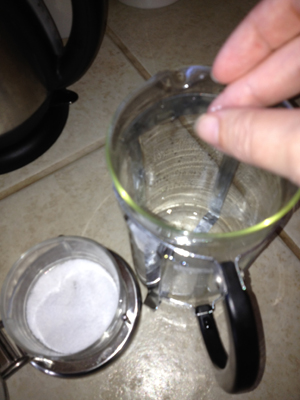
Salt both cuts bitterness and brings out the many flavors in coffee’s oils. Just a pinch will do it!
Use Salt
When you add the grinds to the coffee press, add a pinch of salt, too. The salt helps to enhance and draw out the flavor of the coffee, just like it does any other food. This also cuts back on bitterness. I use sea salt because I love it, but any salt will do.
Saturate the Grounds
When you pour the water in over the salt and grounds, make sure that all of the grinds get really, really wet. Any dry grounds will weaken the coffee.
We pour just a little water in to start, and then use a chopstick (nothing metal) to stir the grounds up and make sure they’ll all wet. Then we pour the rest of the water in, and stir again before we put on the lid and brew.
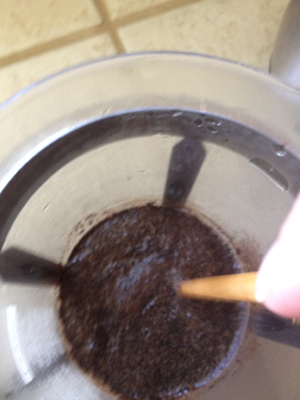
Adding just a little water to the grounds and giving a good stir, before adding the rest of the water, will ensure that all of the grounds get really, really wet and give up their flavor.
Brew for the Right Time
Most instructions call for four to six minutes of brew time, but we have found our perfect cup comes right in at four minutes. The longer the grounds sit, the more you risk bitter flavors.
(This is one of my pet peeves in restaurants. I never know when to press the coffee, because they don’t give out timers! I’m waiting for someone to invest in those little four minute hour glasses and set them down next to the pot. I will love you forever!)
Do not adjust the strength of your coffee with the length of time you brew – it isn’t nice to the grounds. Instead, use more or less grounds until you get it just right for you.
We use a little timer that is set just to four minutes, but any timer will do.
We start our timer after the first stir of the grounds, while we’re pouring the rest of the water into the pot. That way the timer really begins when they’re actually starting to brew!
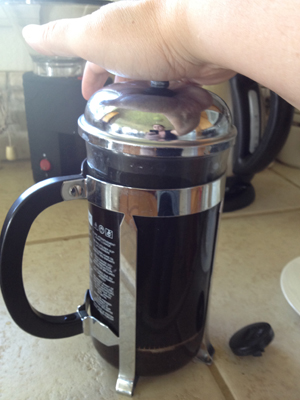
Just the weight of your hand is enough to thoroughly, slowly press the coffee. Remember: the goal is to mix oil into water — it takes time!
Be Gentle
When it’s time to press the coffee, don’t force it. Going too fast risks splashing hot coffee out of the pot, but it also doesn’t do the coffee any flavors.
It helps to remember what you are doing: mixing oil into water. You can’t do this quickly. It takes a little time. I take about a minute to press the coffee, and pass the time singing “Frère Jacques.”
If you like your mornings quiet, try this: place your palm on the knob at the top of the press, and let the weight of your hand be the only force applied as it slowly descends with the press. This is a handy morning meditation.
Once you are at the bottom, give one final little press to ensure the grounds have given up all of their goodness.
Note: Technically, the coffee grounds are still brewing while I take this leisurely press. So … I’m probably really brewing for a total of five minutes, not four. 😉
Be Clean
Coffee oils left on your equipment will go rancid and affect the flavor of later pots, so make sure that you routinely clean your grinder and your pot.
Rinsing your pot and press with hot water after every brew, and thoroughly cleaning it with hot, soapy water at least once a week will help.
Your grinder should be cleaned at least once a week – and make sure you use a good brush to brush off the burrs. The cup that catches the grinds should be washed after every use to keep it clean.
Be Patient
When James and I started pressing our own coffee, it took a week’s worth of breakfasts for us to get the right amount of grounds, the right temperature, and the right length of time to brew. I didn’t even think of the salt until the next week, when I was baking and increased the salt to bring out the caramel flavor in a chocolate chip cookie recipe. But after that, we were set.
If you buy good equipment and treat it well, buy good beans, filter your water, and keep at it until you get the right combination for you, it’ll be worth it.
Step-By-Step Instructions for French Press Coffee
You will need:
- A french press
- Good tasting water (filtered is preferred)
- Whole coffee beans
- A timer set to four minutes
- A wooden chopstick or spoon
- Put your water onto boil. For a 34 ounce press, you will need about 32 ounces of water.
- Grind beans on the coarsest setting of your grinder. You will need two tablespoons of grounds for every six ounces of water in the pot. Adjust your coffee strength in this step: more grounds for stronger coffee, less for weaker coffee.
- Rinse your French press pot with hot water from the tap to preheat it.
- Add a pinch of salt.
- Add grounds right before the water boils.
- When the water is boiling, remove from the heat and let cool for 10-15 seconds.
- Pour water onto coffee grounds in a circular motion, drenching them evenly. Stop when the pot is about ¼ full and, using a chopstick or other wooden utensil, stir the grounds until they are thoroughly wet.
- Start timer and pour the rest of the water in.
- Stir again to make sure all of the grounds are saturated.
- Put the lid on (make sure the press is attached 😉
- When time is up, gently, slowly press the coffee. Visualize those grounds releasing their lovely oils!
- 12. Enjoy
Great Coffee Beans on Maui
Maui Oma Coffee Roasting Company is a wonderful coffee roaster in Kahului, Maui. They are persnickety (in the best sense of the word) and friendly and sell all of their coffee blends online, so you can have them any time of year. Every day I use their signature blend, Maui Oma’s Choice, for my morning coffee. They make blends for many of Maui’s best restaurants, so if you love the coffee at a particular place, ask for their blend! www.HawaiiCoffee.net
PS: You can also stop by and pick up your coffee, but their hours are limited and you should call ahead to be sure they’re open when you’re in town: 808-871-8664
Equipment Recommendations
Grinder:
After years of going through one grinder after another, the Bodum Bistro Electric Burr Grinder is my hands-down favorite, and my best recommendation. It’s $120 on Amazon right now, but it’s worth every penny. It lasts a long time, grinds evenly, and cleans easily. Check it out here.
Press:
For French presses, the Bodum French Press is still the best. They’re made with excellent quality, and I haven’t broken one, ever. Whether you’re making coffee for two or six, you’ll find a size that works for you. And some models are even insulated!
Timer:
This “tea timer” has little hour glasses for 3, 4, and 5 minutes. Cute little timer for the table.
If you need a timer you can hear in the next room, look at this one. Another bonus: you can see the digits across the room.
Electric Kettle:
Using an electric kettle is faster than a stovetop kettle or even a microwave. I like our Hamilton Beach electric kettle because it looks cute on the counter and it’s super-fast.
